Sinkology is proud to present Emily Schuermann, our food-loving guest blogger who runs Food for a Year. Emily is here to share some recipes she has created exclusively for the Sinkology blog that reflect her view of a copper sink: simple, timeless, affordable, and beautifully rustic.
With a house full of growing kiddos, it’s always a good idea to have my pantry stocked with some dessert-making essentials. Essentials like chocolate chips, cocoa powder, butter, powdered sugar — and flour & sugar of course. For the longest time, my sole “go-to” dessert were homemade brownies (similar to this recipe). Fudgy and gooey, perpetually pleasing brownies.

The main reason brownies were my quick dessert solution (besides the obvious deliciousness) was because it is the one quick dessert I could make without a boxed mix.
Then one day it occurred to me – if I could figure out how to make my own homemade cake mix, I could pretty much make any dessert I wanted. So after some research and testing, I came up with a basic, no-fail, 4-Ingredient homemade cake mix. This mix is so versatile: it can be made into a chocolate cake, a cinnamon roll cake, a fruit cobbler, a coffee cake and more. And it happens to be the base of the recipe I’m sharing with you today.

Before I tell you all about this Raspberry Chocolate Chip Cake, let me give you one tip that will make your dessert making efforts so simple. When mixing up one batch of the homemade cake mix, go ahead and mix up 4 or 5 extra batches and store in an airtight canister. Scoop out 4 cups every time you need to make a cake and you are on your way to dessert making made easier! When I need a fabulous dessert in a pinch, this little tip has saved me so many times!


So once you have your homemade cake mix, combine it in a large mixing bowl with ::
- milk,
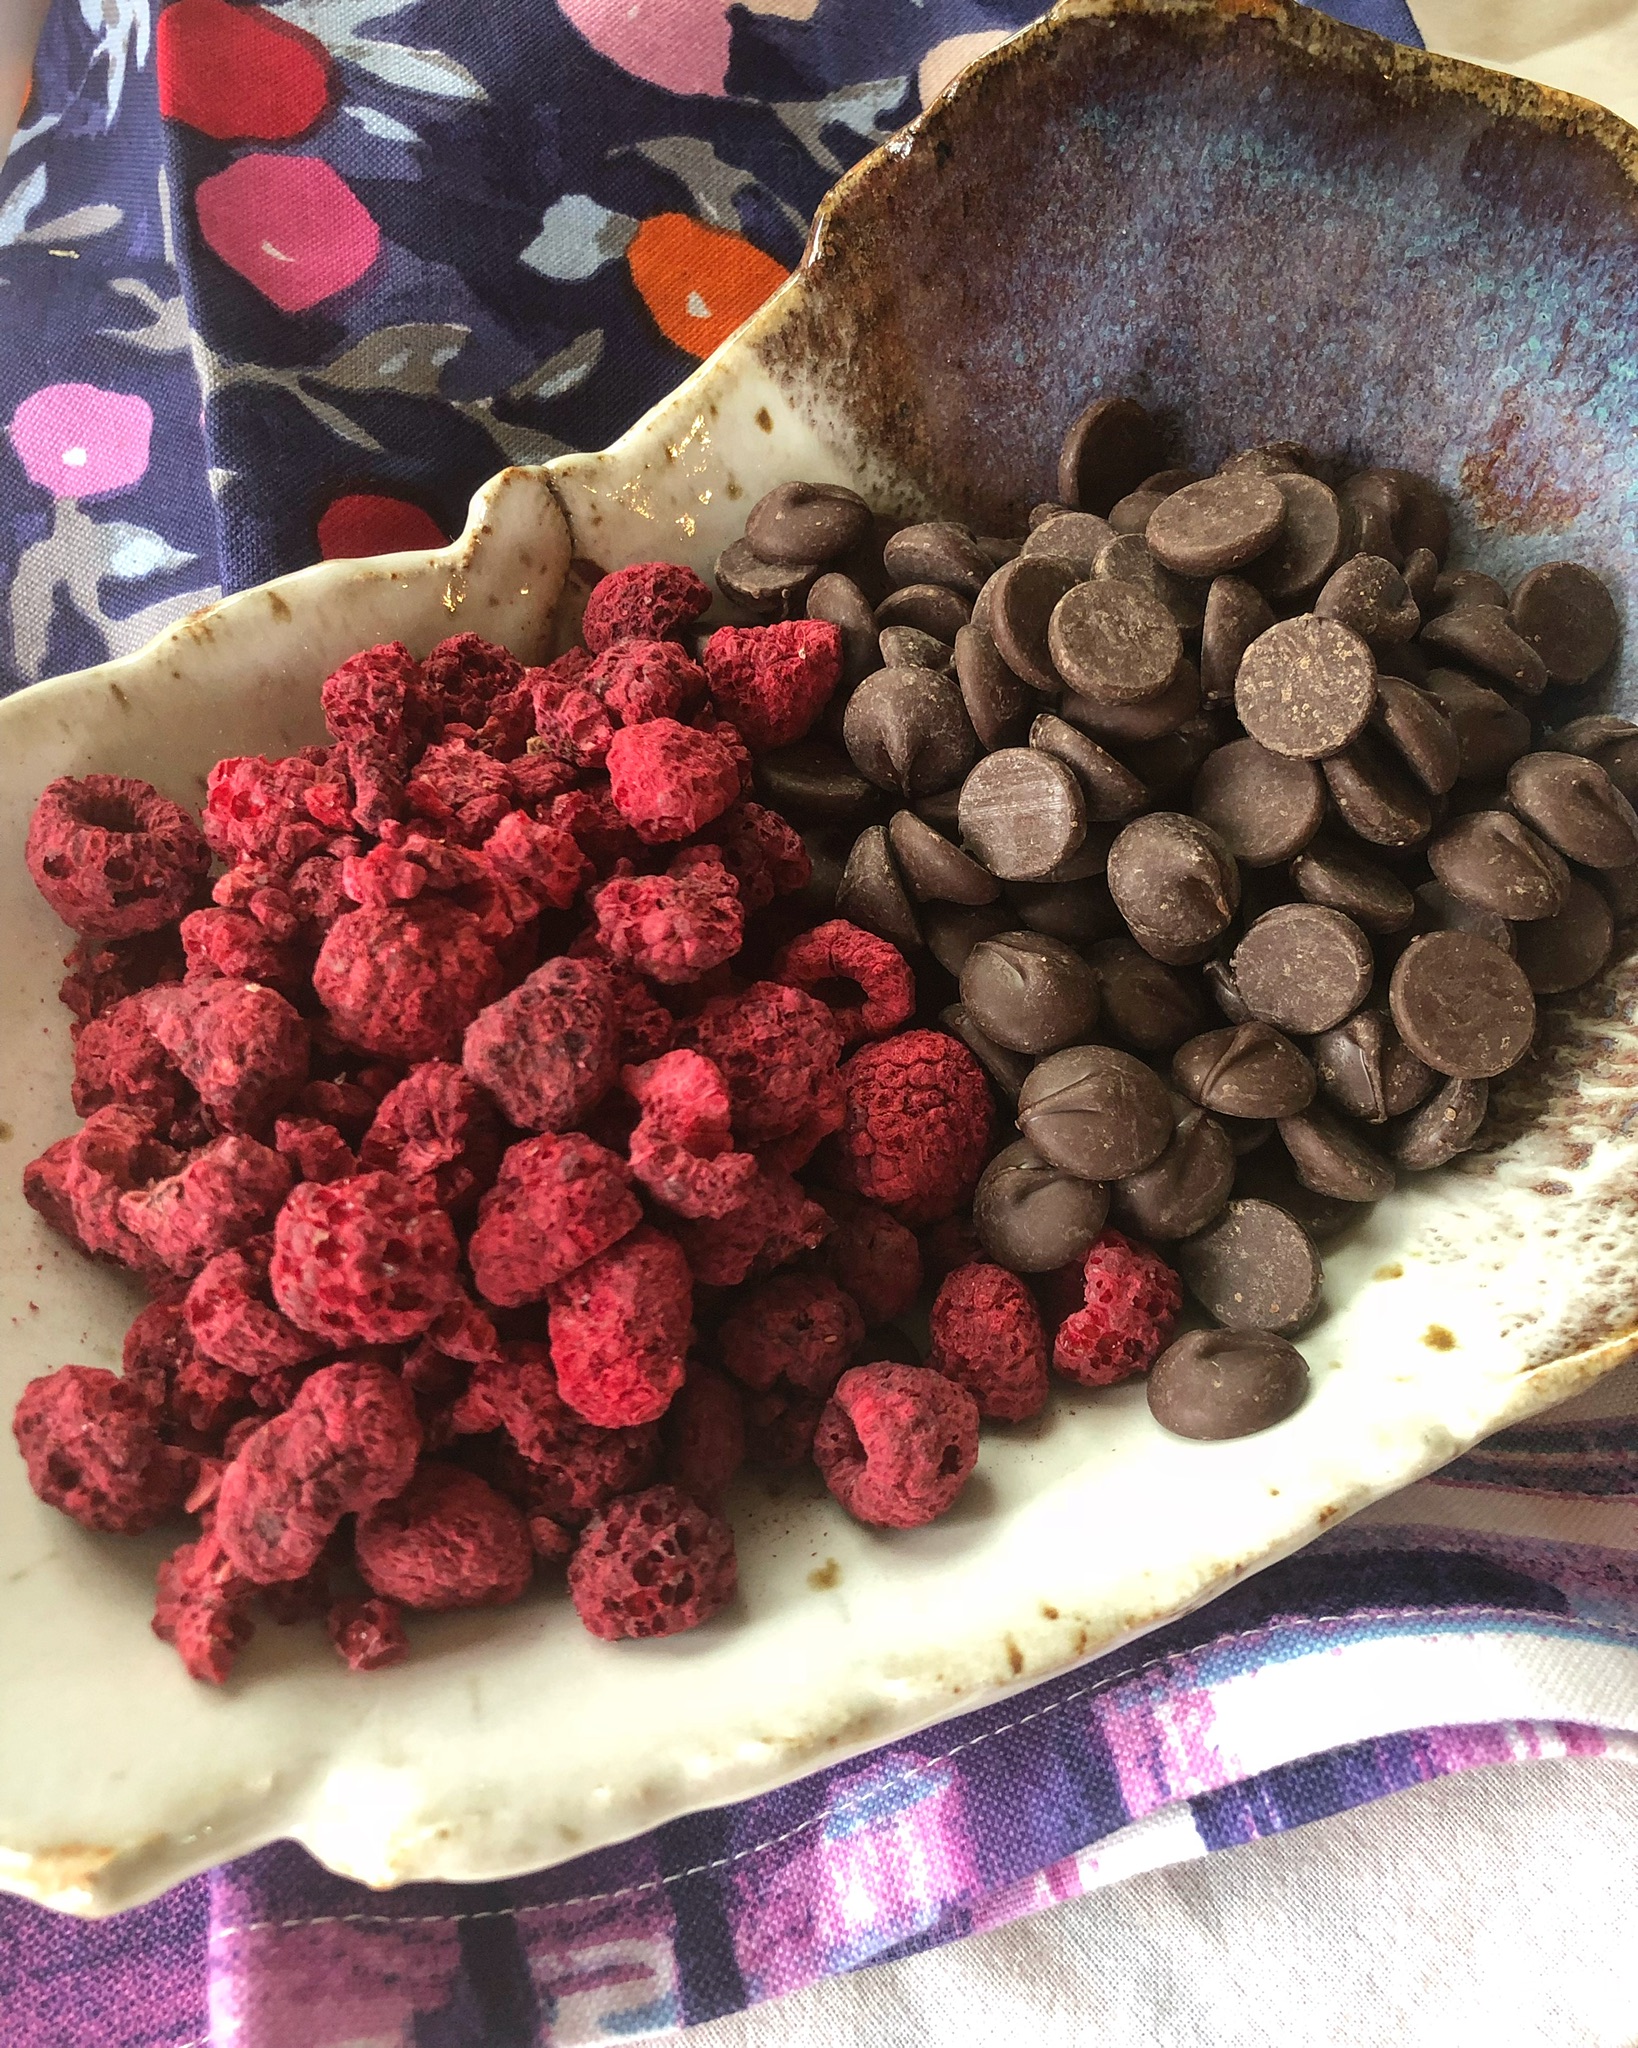
- powdered freeze-dried raspberries,
- instant vanilla pudding and
- vanilla extract.
Using a spatula or large spoon, stir to combine. Be sure to scrap the side and bottom so that all ingredients incorporate evenly. ((The batter will be very thick))


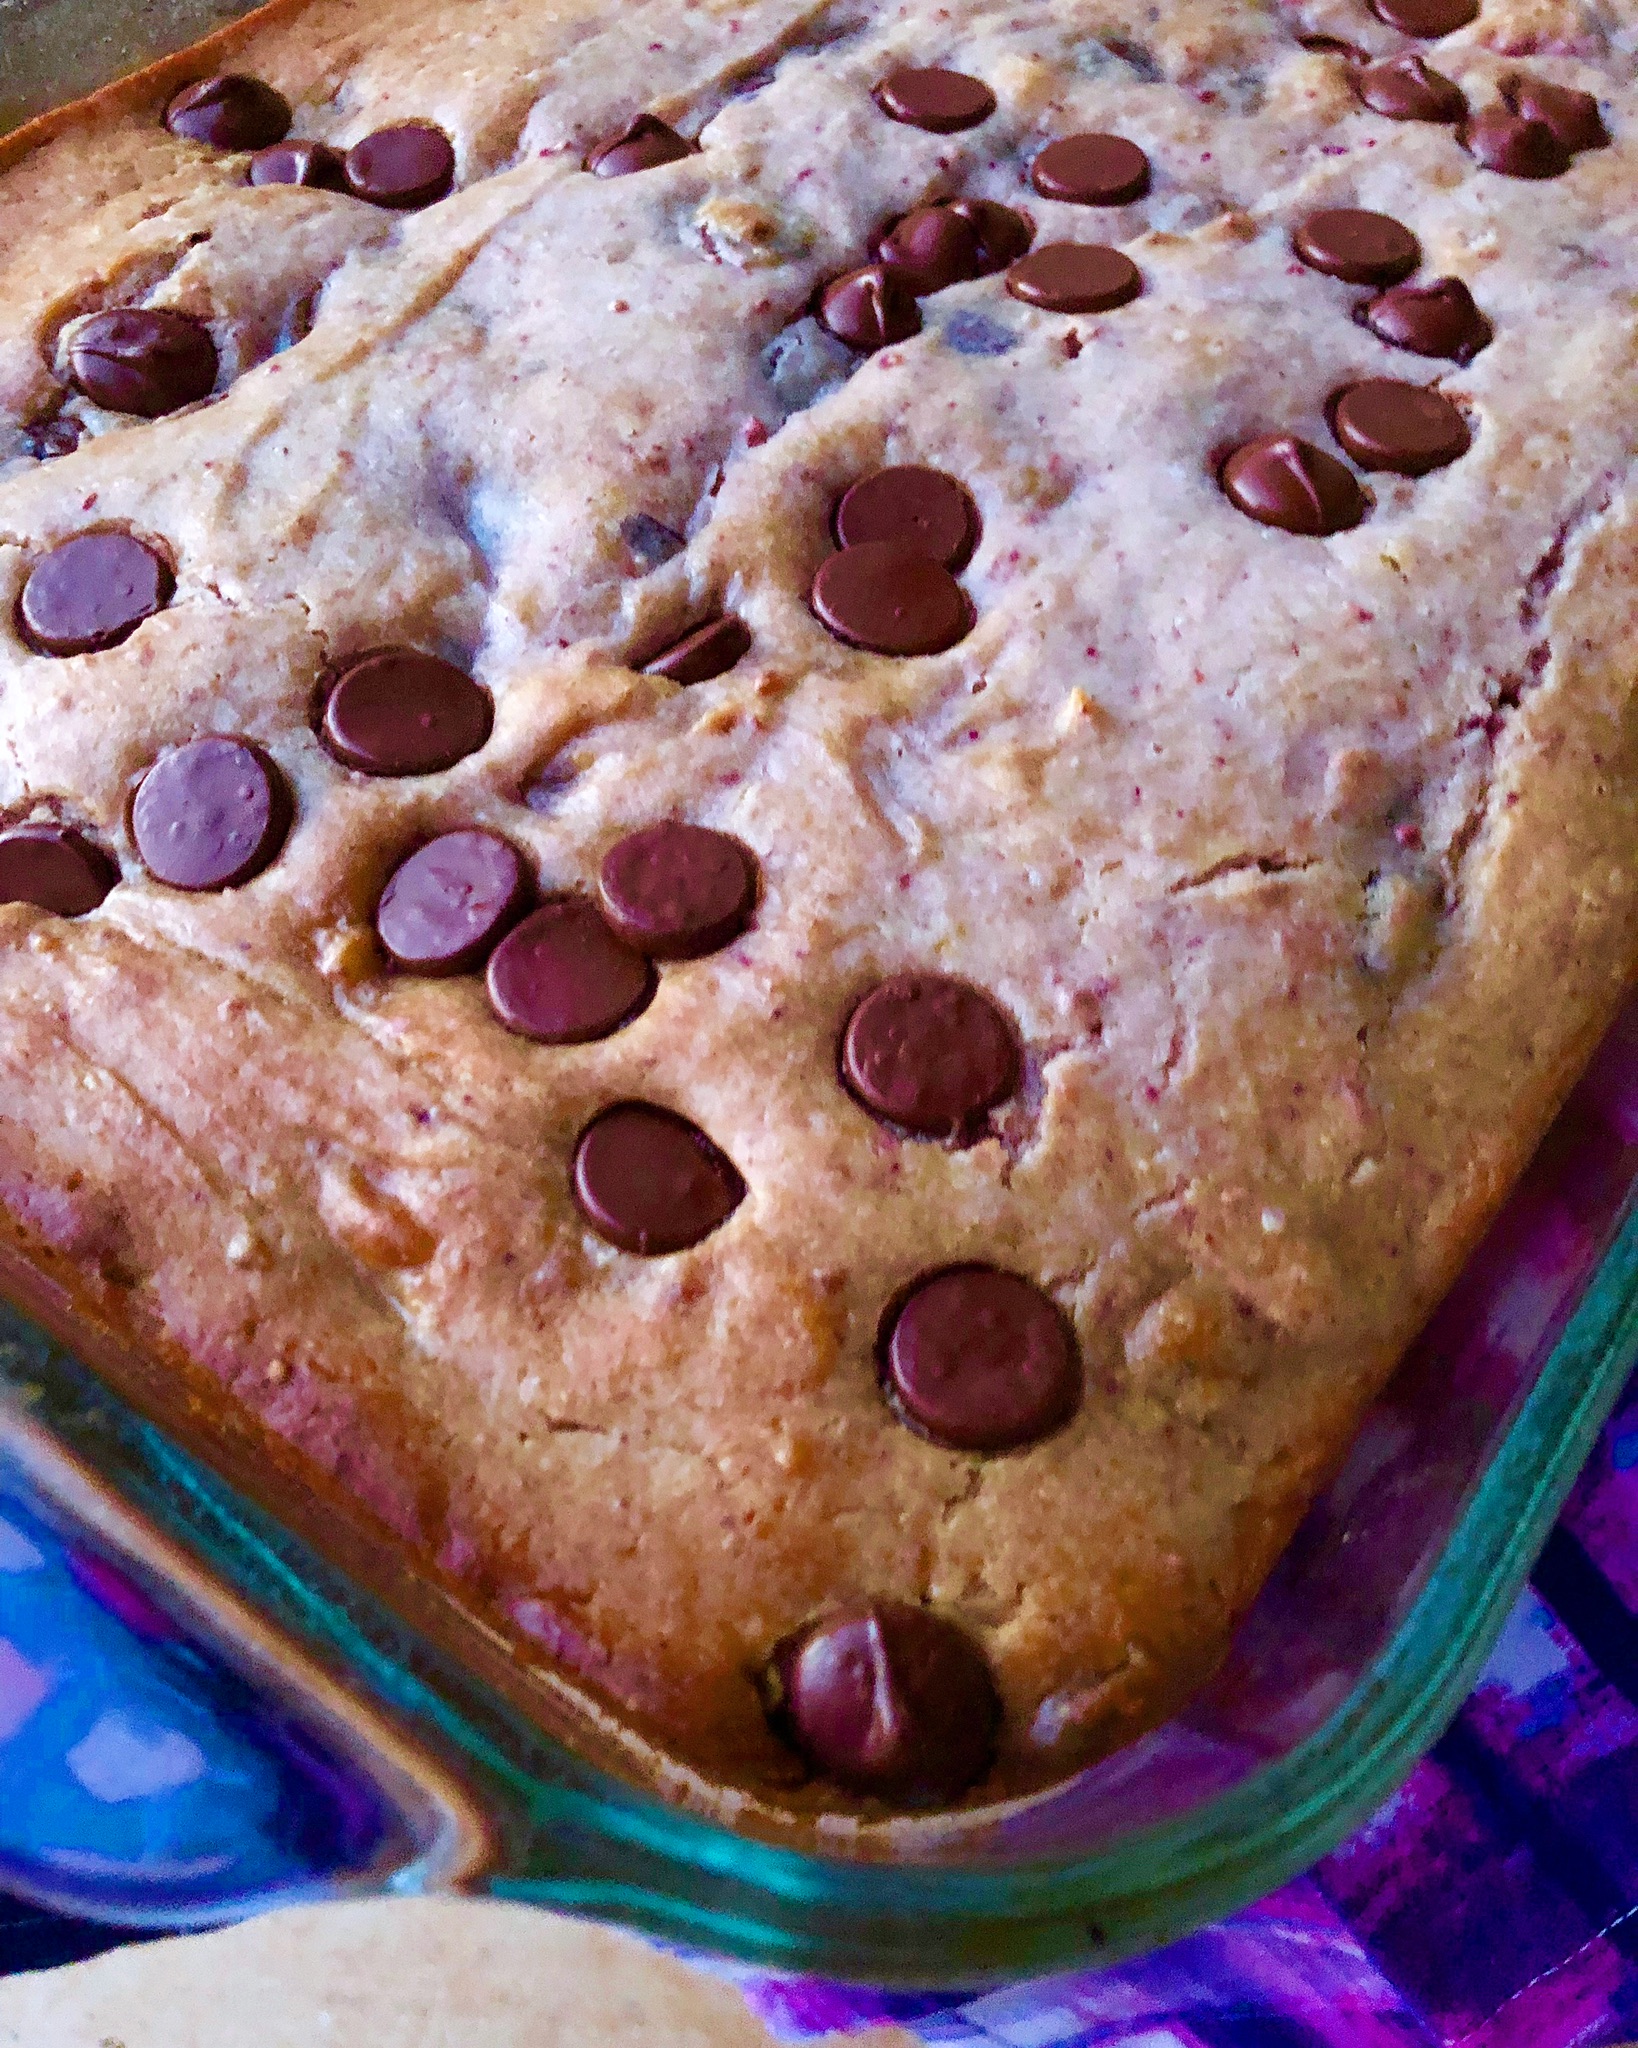
Fold in the chocolate chips and spread the batter into the prepared baking dish. I like to sprinkle a few extra tablespoons of chocolate chips over the top (just for looks).

Place the cake into the preheated oven and bake for 45-50 minutes or until the center is set and a toothpick (inserted into the center) comes out clean. Begin checking for doneness at around 42 minutes.
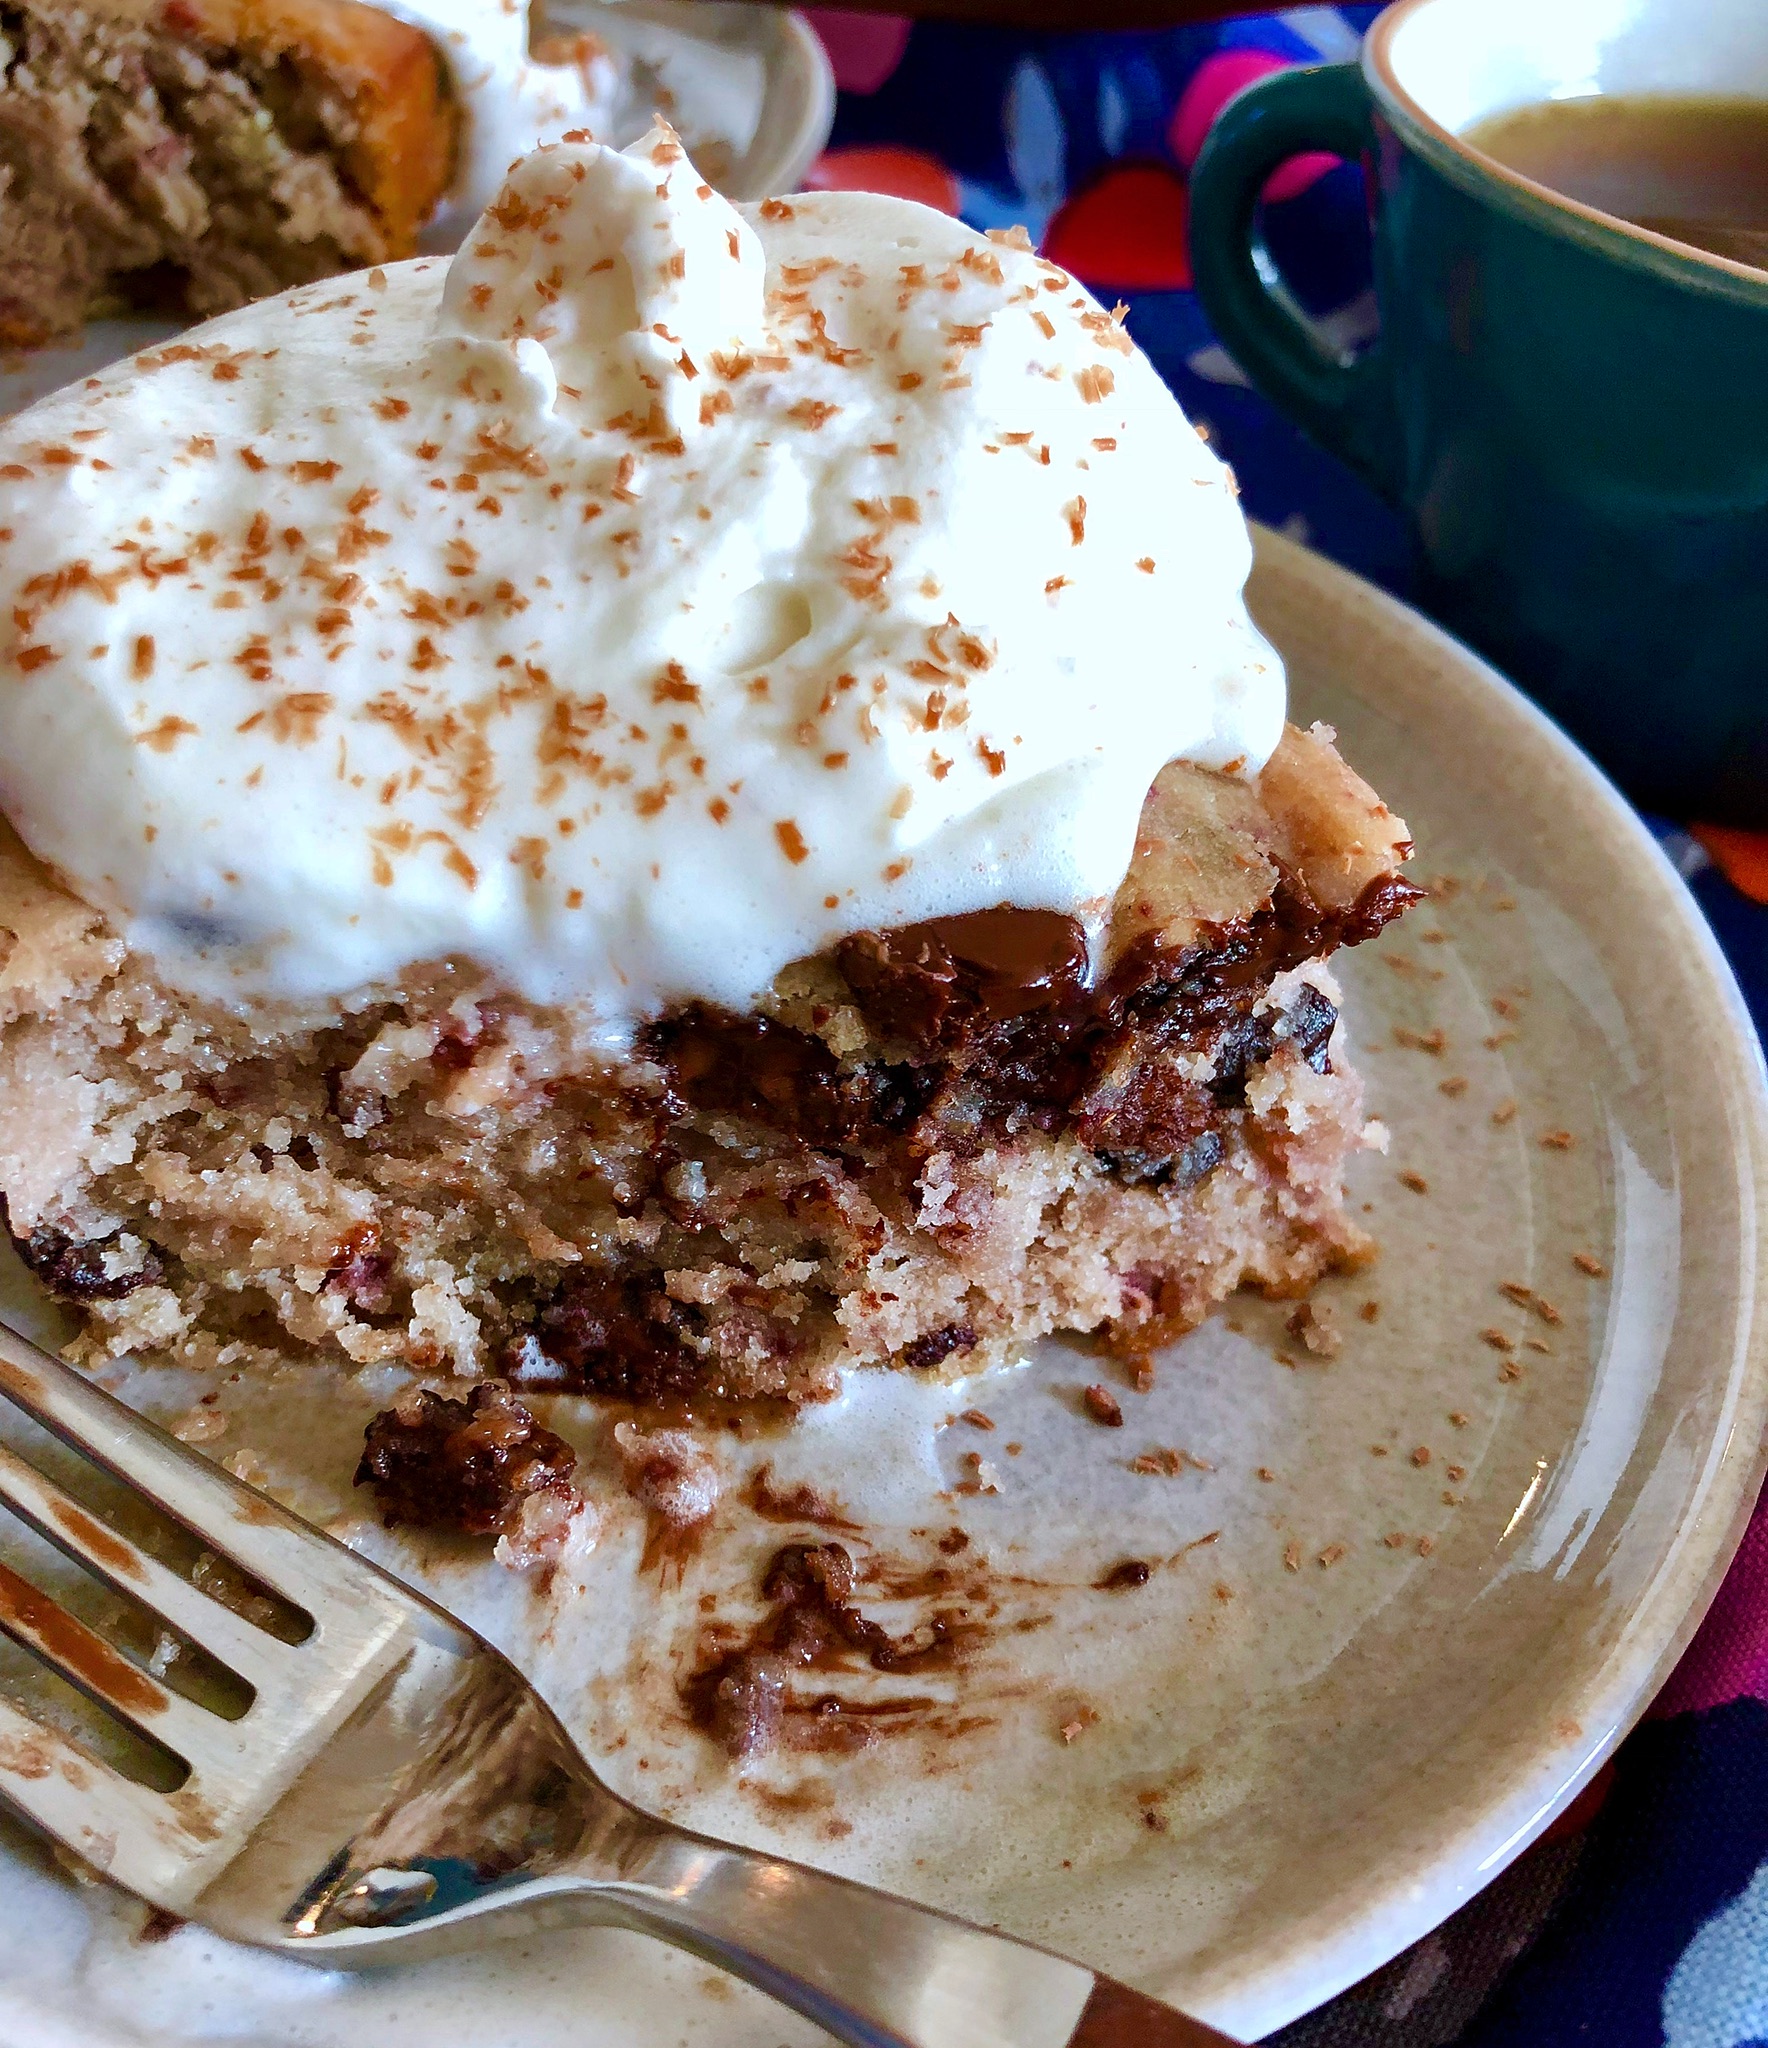
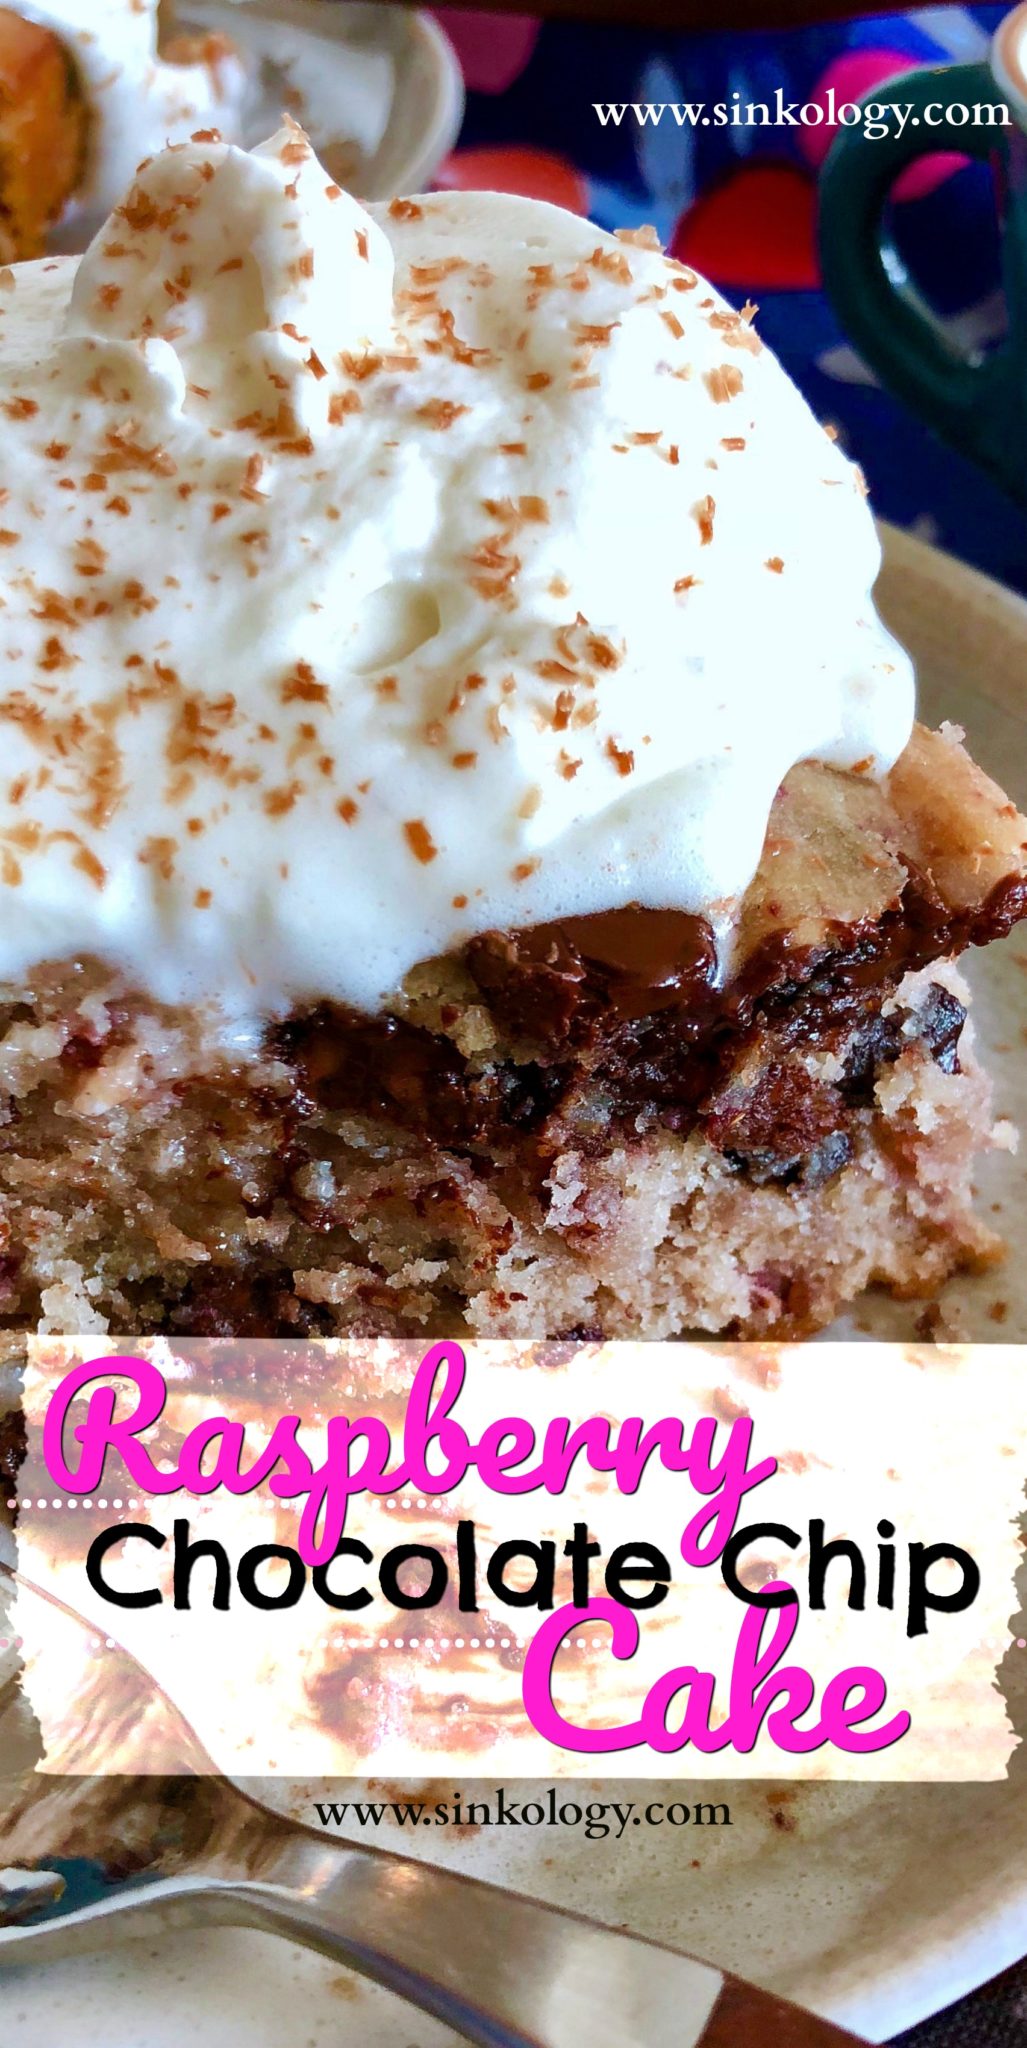
While the cake is baking, prepare the homemade sweetened whipped cream. This step is optional, so feel free to skip it ((but wow! is it tasty +easy!!)).

To make the whipped cream, combine ::
- cream,
- salt powdered sugar and
- shaved chocolate
in a medium mixing bowl.
Using a hand mixer, beat on HIGH until the cream becomes stiff and forms soft peaks. Cover and refrigerate until ready to serve.
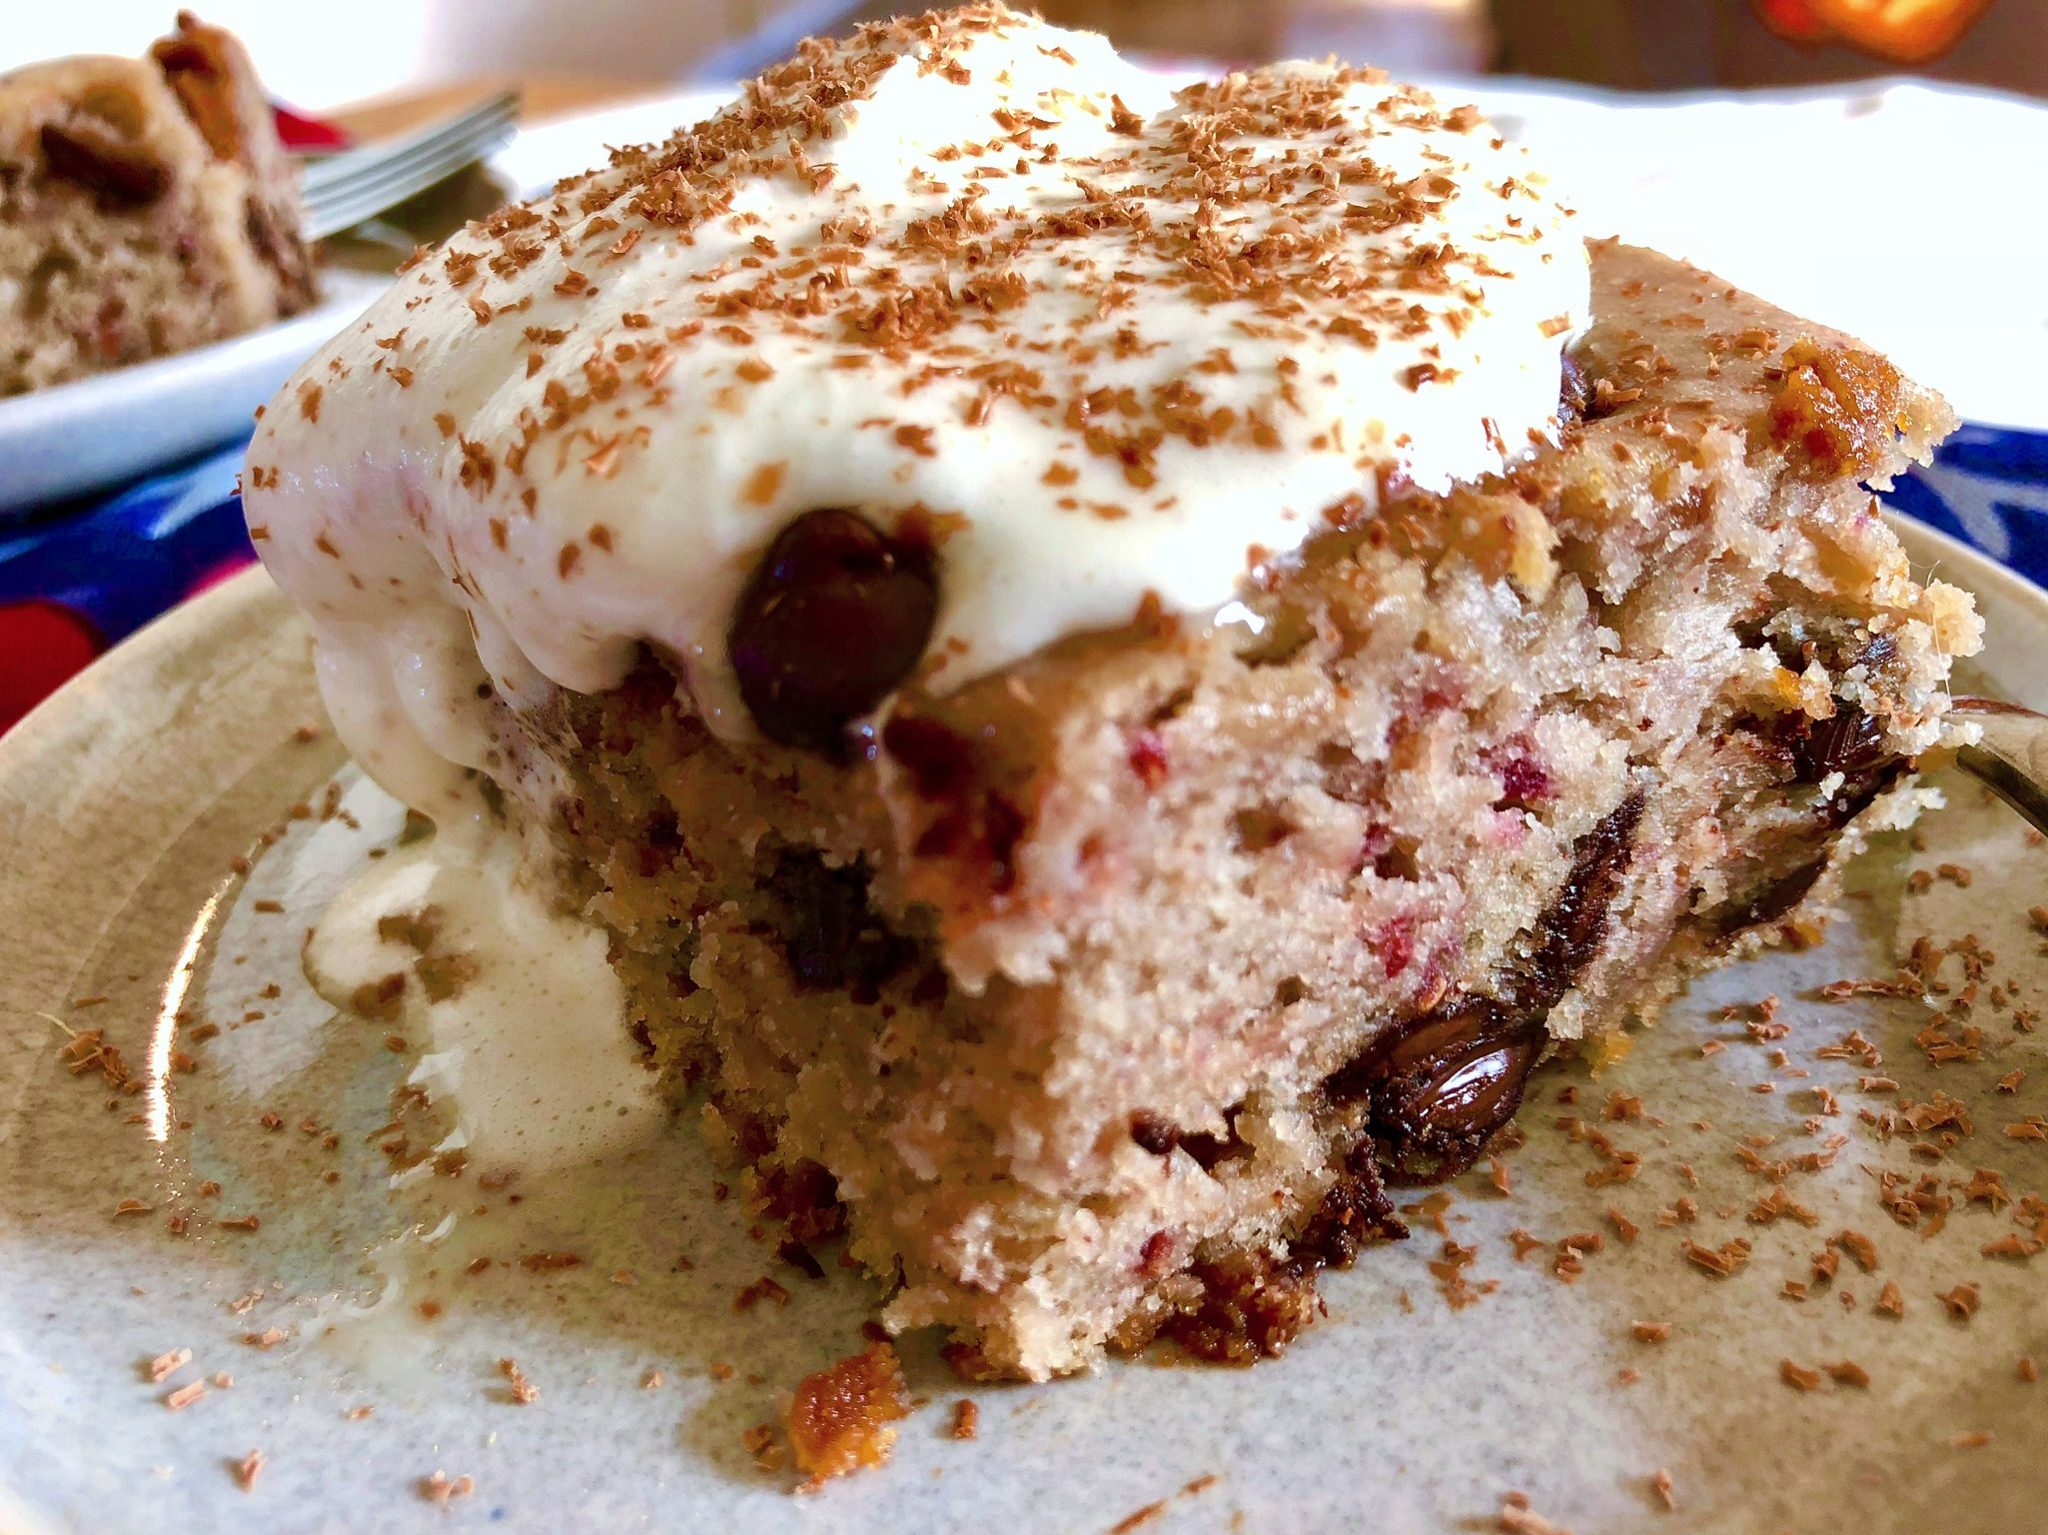
Once cake is finished baking, remove it from oven and allow to cool for 10 minutes before serving. To serve, top with a dollop of homemade chocolate chip whipped cream if desired.

The best part about this recipe (besides the taste) is that you can totally make it your own by replacing the freeze-dried raspberries with freeze-dried blueberries or strawberries or even diced fresh fruit. You could even leave the fruit out and change up the pudding flavor (how about chocolate or pumpkin spice) – the options are limitless!

Now let’s talk cake! It’s so moist, the short ingredient list keeps the flavors clean — just like a perfect homemade cake should taste — and the freeze-dried raspberries turn the cake the most lovely lilac color. But the real showstopper is the flavor, warm, melty semi-sweet chips partner perfectly with that tangy, bright raspberry flavor. The first bite is a knee-buckler so be sure to be sitting while you eat!
Raspberry Chocolate Chip Cake
2018-01-30 11:42:11
Serves 15
- 4 c pre-made homemade cake mix*
- 2 c milk
- 1-4 oz package of instant vanilla pudding
- 2/3 c softened butter, salted
- 1 oz freeze-dried raspberries
- 2 t vanilla extract
- 1 1/2 c semi-sweet chocolate chips
- 2 c heavy whipping cream
- 4 T powdered sugar
- a pinch of fine sea salt
- 2-3 T chocolate shavings (from a chocolate bar of your choice)**
- Preheat oven to 350°. Spray a 9" x 13" glass baking dish with non-stick cooking spray (I prefer Baker's Joy).
- Place freeze-dried raspberries into a food processor and pulse until the raspberries have become a powder.
- In a large mixing bowl, combine pre-made homemade cake mix ((or the 4 ingredients listed below*)). Whisk to combine and add milk, powdered freeze-dried raspberries, instant vanilla pudding and vanilla extract. Using a spatula or large spoon, stir to combine. Be sure to scrap the side and bottom so that all ingredients incorporate evenly. ((The batter will be very thick))
- Fold in the chocolate chips, saving 3-4 T to sprinkle on top.
- Spread the batter into the prepared baking dish and sprinkle with remaining chocolate chips.
- Place into the preheated oven and bake for 45-50 minutes or until the center is set and a toothpick (inserted into the center) comes out clean. Begin checking for doneness around 42 minutes.
- While the cake is baking prepare the homemade sweetened whipped cream. This step is optional, so feel free to skip. In a medium glass mixing bowl, combine cream, salt powdered sugar and shaved chocolate**. Using a hand mixer, beat on HIGH until the cream becomes stiff and forms soft peaks. Cover and refrigerate until ready to serve.
- Once cake is finished baking, remove from oven and allow to cool for 10 minutes before serving.
- To serve, top with a dollop of homemade chocolate chip whipped cream if desired.
- Serves 15
- 2 3/4 c AP flour
- 1 t fine sea salt
- 2 1/2 t baking powder
- 1 1/2 c granulated sugar
- **To prepare shaved chocolate, microplane, zest or finely chop a chocolate bar until you have 2-3T of chocolate shavings.
By Emily Schuermann
Adapted from Food for a Year
Sinkology http://www.sinkology.com/

The post Raspberry Chocolate Chip Cake appeared first on Sinkology.
source
http://www.sinkology.com/blog/raspberry-chocolate-chip-cake/